
First Published: April 29, 2026 Last Update: July 27, 2026
Installing metal roofing panels isn’t complicated, but the details matter. Get the layout square and the fasteners right, and the roof lasts for decades. Here’s the process from start to finish. If your roof is steep or complex, hire a pro.
Before You Start: What You Need on Site
Tools and Equipment
- Metal snips (aviation snips, left and right cut)
- Circular saw with a metal-cutting blade or nibbler for long cuts
- Screw gun or impact driver with a hex head bit (for exposed fastener panels)
- Chalk line and tape measure
- Speed square
- Seaming tool (for mechanically seamed standing seam panels only)
- Ladder and fall protection
- Safety glasses and gloves
Materials Checklist
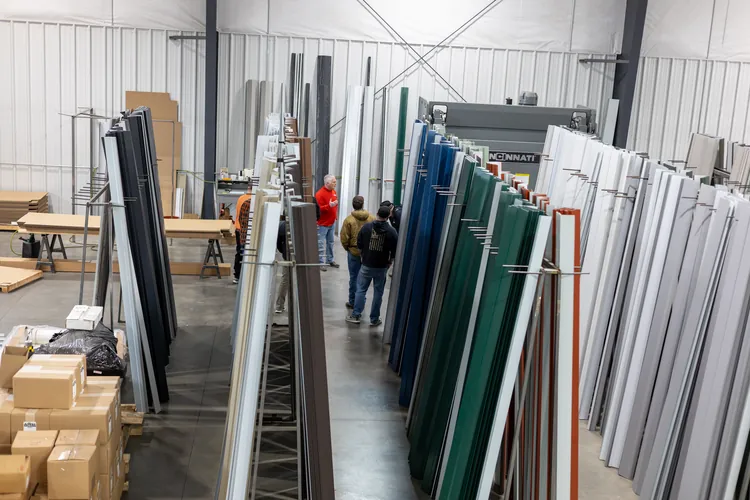
- Panels cut to length (Metal America fabricates to your specified lengths)
- Underlayment or vapor barrier appropriate for your panel system
- Closure strips (inside and outside) at eave and ridge
- Full trim package: eave trim, rake trim, ridge cap, and any wall or valley flashing
- Fasteners matched to your panel system (neoprene-gasketed screws for exposed fastener; clips and concealed fasteners for standing seam)
- Sealant tape where specified
TLDR: Step by step Installation
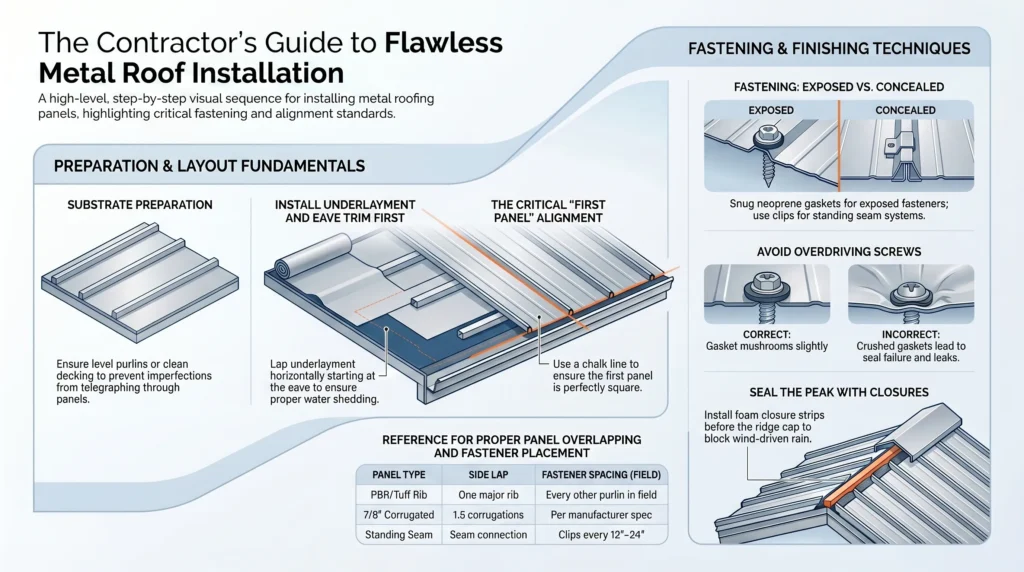
- Deck and underlayment. Start with a solid deck and the right underlayment. Add peel-and-stick at eaves and valleys. See our underlayment guide.
- Eave and starter trim. Install drip edge and any starter or closure strips along the eave.
- Set the first panel square. This is the most important step. If the first panel isn’t square to the roof, every panel after it drifts. Check it twice.
- Fasten correctly. On exposed fastener panels, drive screws into the flat next to the rib, snug but not overdriven. On standing seam, clip the panels and let them float.
- Overlap and seam. Lap exposed fastener panels one rib and seal the sidelap. Snap or seam standing seam panels per the profile.
- Flashing and valleys. Flash walls, valleys, and penetrations so water always drains onto the panel, never behind it.
- Ridge and closures. Finish with foam closures and ridge cap for a weathertight, vented ridge.
Step 1: Inspect and Prepare the Substrate
Before any panel goes up, the substrate has to be right. For exposed fastener systems on purlins, check that purlins are level, properly spaced, and adequately fastened. Purlins that are out of plane will show through the finished panels.
For standing seam systems installed over solid decking, check the deck for any soft spots, fastener pops, or surface irregularities. Metal panels will telegraph imperfections in the substrate over time.
Remove any old roofing material, debris, or protruding fasteners before proceeding.
Step 2: Install Underlayment
Underlayment goes down before panels on most applications. The right underlayment depends on the building type and panel system. For residential standing seam, a self-adhering underlayment or a high-temp synthetic underlayment is standard. For exposed fastener agricultural panels over open purlins, a vented closure or a basic vapor retarder may be all that is needed.
Install underlayment horizontally starting at the eave and lapping upward, so upper courses overlap lower courses and water sheds over the laps rather than under them. Follow manufacturer overlap requirements. Staple or nail as specified and avoid wrinkles or bubbles that could telegraph through the panels.
Step 3: Install Eave Trim
Eave trim goes on before the first panel. It defines the bottom edge of the roof plane, creates a drip edge, and gives the panels something to register against. Lap eave trim pieces at least 2 inches at joints and fasten per the trim installation guide.
Take your time getting the eave trim straight and level. If the eave trim is off, the panels will be off and it will be visible from the ground.
Step 4: Install Closure Strips at the Eave
Foam closure strips fill the open ribs or corrugations at the eave, blocking insects, birds, and wind-driven rain from entering the building through the panel profile. Use outside closure strips at the eave (the contoured side faces out). Press them firmly against the eave trim before the first panel goes down.
Step 5: Lay Out Your First Panel
The first panel sets the alignment for everything that follows. Snap a chalk line parallel to the rake edge at the correct inset distance for your panel system. Check the panel for square by measuring the diagonal from the eave corner. A panel that is even slightly out of square at the start will drift further off over the length of the roof.
On most exposed fastener systems, the first panel overlaps the rake edge by the specified amount per the installation guide. On standing seam systems, the first panel clips to the eave and is plumbed carefully before proceeding.
Step 6: Fasten the First Panel
Exposed Fastener Panels
Drive neoprene-gasketed screws through the panel face at the major ribs. Do not overdrive. An overdriven screw compresses the neoprene gasket past its design point, which actually reduces the seal. The screw should be snug with the neoprene washer slightly mushroomed out around the base, not crushed flat.
Follow the fastener pattern specified for your panel and purlin spacing. For most exposed fastener systems, screws go at every purlin on the ends and at alternating purlins in the field.
Standing Seam Panels
Standing seam panels attach through concealed clips fastened to the substrate. The panel edges snap or lock over the clips at the seam. Clips are installed at the specified spacing (typically every 12 to 24 inches depending on the system and wind zone) before the next panel is set.
On QuickLoc and snap lock systems, the seam snaps together by pressing down on the panel edge. On mechanically seamed systems, the seaming tool runs along the seam after the panel is positioned, folding the edges together into the mechanical lock.
Step 7: Install Subsequent Panels
Each panel overlaps or interlocks with the previous one. On exposed fastener systems, the overlap rib of the new panel fits over the edge rib of the panel already in place. On standing seam, the new panel’s seam leg engages the clip and the previous panel’s standing seam.
Check alignment every few panels by measuring from the chalk line or the eave trim. It is easy to drift slightly and the earlier you catch it the easier it is to correct. Do not pull panels out of plane to force them to a line; this creates stress and distortion in the panel.
Step 8: Handle Roof Penetrations
Pipes, vents, skylights, and other penetrations need to be properly flashed before panels are installed over them. Metal roofing flashings are typically folded metal pieces custom-fitted to the panel profile. Do not use generic pipe boots or generic flashing not designed for metal roofing, as these create leak points at the panel seam.
Flash penetrations before the panels reach them, not after. Trying to retrofit flashing around an existing panel is significantly harder and less watertight than doing it in sequence.
Step 9: Install the Ridge
At the ridge, install inside foam closure strips on both sides of the peak before the ridge cap goes on. The inside closures fill the panel profile at the top and block weather and pests. The ridge cap then covers both sides of the peak, lapping down over the top course of panels on each side.
Fasten the ridge cap through the ribs per the installation guide. Use sealant tape under the ridge cap laps at joints. On a hip roof, hip cap pieces follow the same general sequence as ridge.
Step 10: Install Rake Trim and Remaining Trim Pieces
Rake trim covers the panel edges at the gable ends and keeps water from running under the panel edge. Lap rake trim pieces at joints and fasten per the trim guide. Wall trim, valley flashing, headwall flashing, and any other transitions should all be installed in the proper sequence for your specific roof geometry.
Trim is where most metal roofing installations either look sharp and perform well or look sloppy and eventually leak. Take the time to do trim correctly.
Common Installation Mistakes to Avoid
- Overdriving fasteners on exposed fastener panels. The gasket should mushroom slightly, not be crushed flat.
- Skipping inside closure strips. This is how bugs, birds, and wind-driven rain get into the building.
- Starting the first panel out of square. Everything downstream of that panel will be affected.
- Not checking alignment every few panels. Small drift adds up fast over a long roof run.
- Installing trim after panels when it should go on before. Know the sequence for your roof geometry before you start.
- Using the wrong fasteners. Always use the fastener type specified for your panel system.
Panel Overlap and Fastener Spacing Quick Reference
| Panel Type | Side Lap | End Lap (if applicable) | Fastener Spacing (field) |
| PBR Panel | One major rib | 6″ min with sealant | Every other purlin in field; every purlin at ends |
| Tuff Rib | One major rib | 6″ min with sealant | Every other purlin in field; every purlin at ends |
| 7/8″ Corrugated | 1.5 corrugations | 6″ min with sealant | Per manufacturer spec for purlin spacing |
| Standing Seam (snap lock) | N/A (seam connection) | N/A (single run) | Clips at 12″–24″ per wind zone |
| Mechanically Seamed | N/A (seam connection) | N/A (single run) | Clips per engineered spec |
Always follow the specific installation guide for your panel system. Metal America can provide panel-specific installation documentation when you order.
Get a Quote
Find the Best Panel for Your Next Project
Fill out the form below and our team will get back to you within 24 hours with pricing and availability.
E-mail
sales@metalamerica.com
Phone number
855-638-2587